Auto-correction is one of those features you either love or hate. We see it most in text messaging apps. And, it can be aggravating when you end up sending something in a message that you didn’t mean to, all because it was “automatically corrected” for you.
InMicrosoft Word, however, the AutoCorrect feature can be quite useful. It can save you from errors, help you get your words out quicker, and format your document as you type. Here’show to access, view, and adjust AutoCorrect settings in Wordon Mac.

Access the AutoCorrect settings
Word AutoCorrect settings
The AutoCorrect settings should be the first options you see with theAutoCorrectbutton in blue. The first checkmark at the top is to enable auto-correction of spelling and formatting. But, you can configure the options within it.
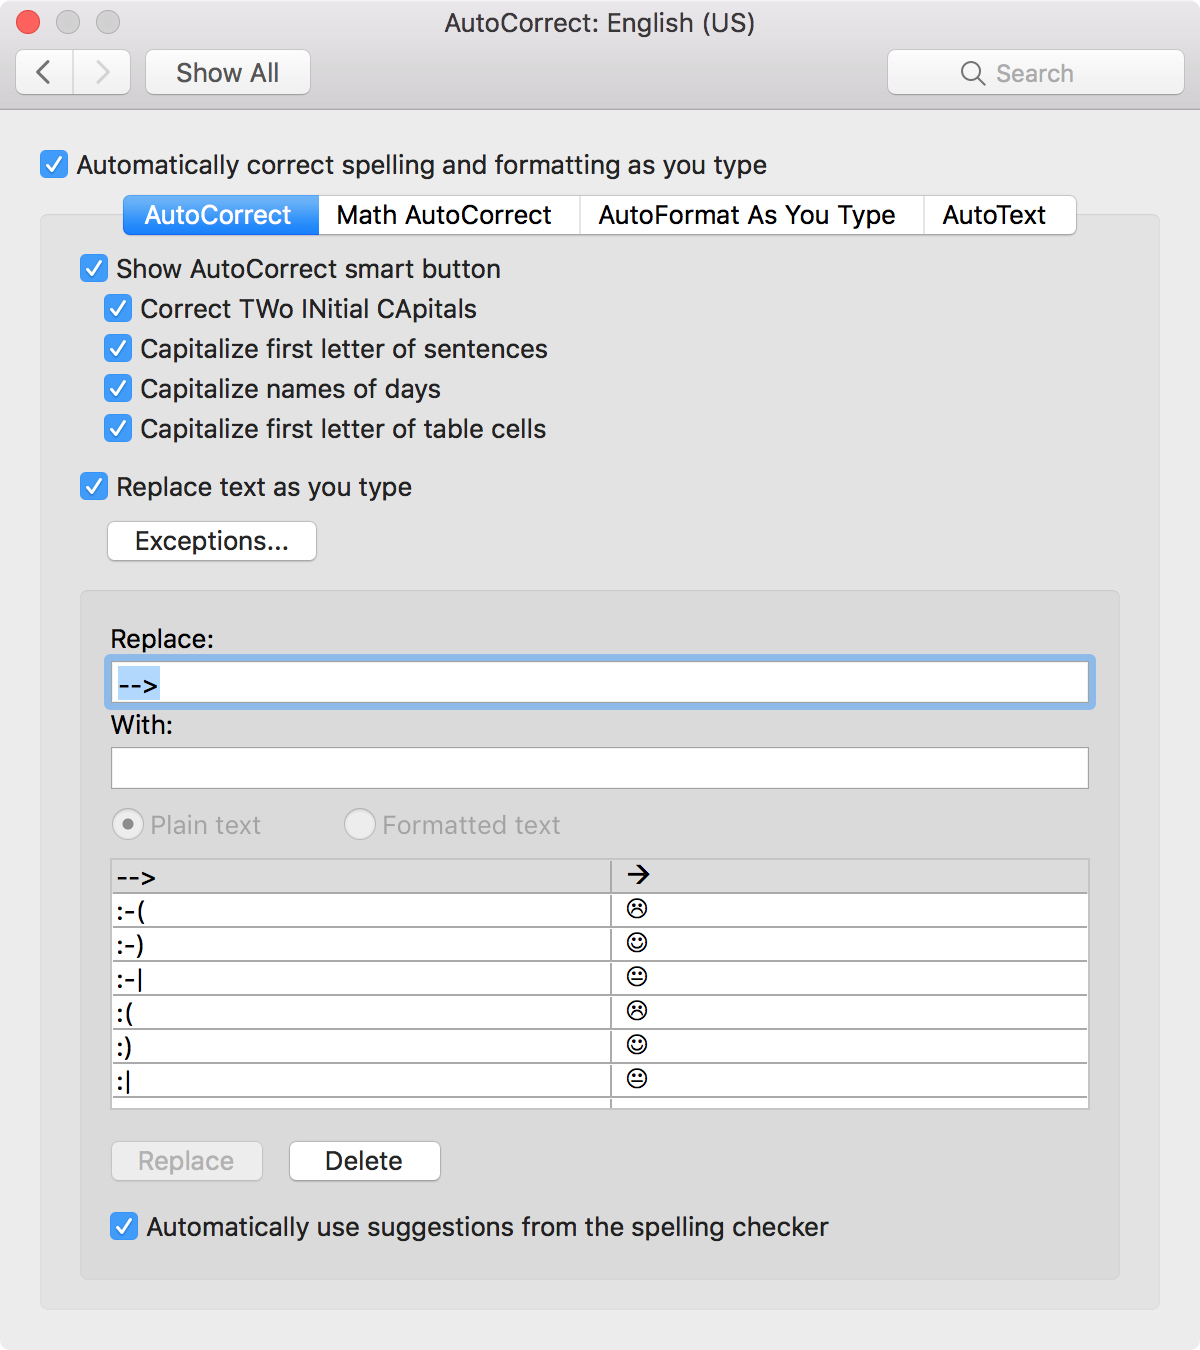
AutoCorrect options
You can choose to show the AutoCorrect smart button, which displays in your document when an auto-correction takes place. Below that, you have additional options for correcting two initial capital letters and capitalizing the first letter of sentences, names of days, and the first letter of table cells.
Each of these is very handy, especially correcting two initial capitals. So, if you type “THe,” AutoCorrect will change it to “The.”

Exceptions
Next, you will see theReplace as you typesection. You can click theExceptionsbutton to adjust those auto-corrections for the first letter and initial caps, along with custom corrections. TheFirst Lettersection lists those items ending in a period where you do not want a capital letter following them like “abbr.,” “gov.,” and “encl.”
The other two sections are for you to customize. For instance, if you want Wordnot to correctinitial caps for a certain word or abbreviation you use often, you can add that here.
Replacements
Back to the main Word AutoCorrect window, you can see a list of the replacements at the bottom. These are also pretty convenient. As you can see, Word will pop in symbols and emojis based on what you type. Plus, there are spelling corrections like changing “acn” to “can” and “alot“ to “a lot.”
you’re able to remove a correction by selecting it and clickingDelete. You can also add your own corrections by typing in theReplacebox, adding what you want to replace itWith, and clickingAddwhen you finish.

Word AutoFormat settings
In the Word AutoCorrect window, click the button forAutoFormat As You Type. Here, you can check or uncheck the formatting options.
You’ll see replacements and corrections that will take place when you type. For example, ifAutomatic numbered listsis checked, whenever you type the number1and hitEnter, a numbered list will start, and the number2will automatically show on the next line.

You also have options to mark how to handle formatting for fractions, quotes, hyphens, and more. So, just check those you want to use.
Auto-correction is one of those tools that can be very helpful in certain situations. And, when it comes to writing up a document in Microsoft Word, it can be a handy time-saver. Do you use AutoCorrect in Word on your Mac, or do you prefer to stay away from the feature altogether?
