This is Part 2 of a two-part guide on how to use futurerestore.
Beforeattempting this guide,everyone should readthe introductory article,Guide to futurerestore: Introduction. This will explain whether the guides apply to you, as well as making sure that you fulfil the requirements for it to work.

If youcurrently have a jailbreakand you want to move to a different firmware with futurerestore’sgenerator mode,you must followPart 1 of the guidebefore following Part 2.
If youcurrently have no jailbreak,and you want to move to a different firmware with futurerestore’sApnonce collision mode,doonlythis part of the guide. This method does not apply to most users.
Before you begin following the instructions, read the entire article through once. This will save time and errors. verify you have all the required files ready before you begin. These are listed in theintroductory article.
The method works on iOS, iPadOS, and tvOS, given that you have already followed the previous guides correctly. It can be performed on Mac, Windows, or Linux, and the commands will be the same. Just make sure you have downloaded the futurerestore program for your computer’s OS, and are using your OS’s respective Terminal.
This guide can be used to move between any two firmwaresin principle, BUT ONLY IFyou meet all the requirementslisted in theintroductory article. Examples of futurerestores which are possible at the time of writing include, but are in no way limited to, iOS 13.5 > 14.3, iPadOS 13.2 > 14.3, iOS 12.4 > 14.3, iOS 11.4.1 > 14.2, and tvOS 13.4.8 > 14.4.
Instructions
1)Download theIPSWfile for yourdestinationfirmware fromthis source.
For example, if I wanted to move to unsigned iOS 14.3, I would download the IPSW for iOS 14.3 (my destination firmware). It does not matter what your starting firmware is.
Bear in mind, If there is no currently signed firmware which is compatible with your destination firmware, you cannot use futurerestore with the generator nor the Apnonce collision mode. For example, signed iOS 14.x firmwares are not compatible with unsigned iOS 13.x firmwares, so I cannot restore to iOS 13.x with futurerestore, but I can restore to iOS 14.x.
Make sure you download the correct IPSW file for your specific device. Remember: some devices, like the iPhone 7, have multiple models (GSM vs. Global) with different IPSWs. Select the correct ones, or your restore couldfail.
2)Download thelatest version offuturerestore. Unzip the file.
3)Create a folder on yourDesktopand call itfuturerestore.
4)Find thefuturerestore executableinside the folder you downloaded and unzipped in Step 2. Rename the futurerestore executable to justfuturerestoreif it has a more complex name. Move it into the futurerestorefolder you created on your Desktop. Copy yourIPSW fileandyour.shsh2 blob for your destination firmwareinto the Desktop futurerestorefolder too.
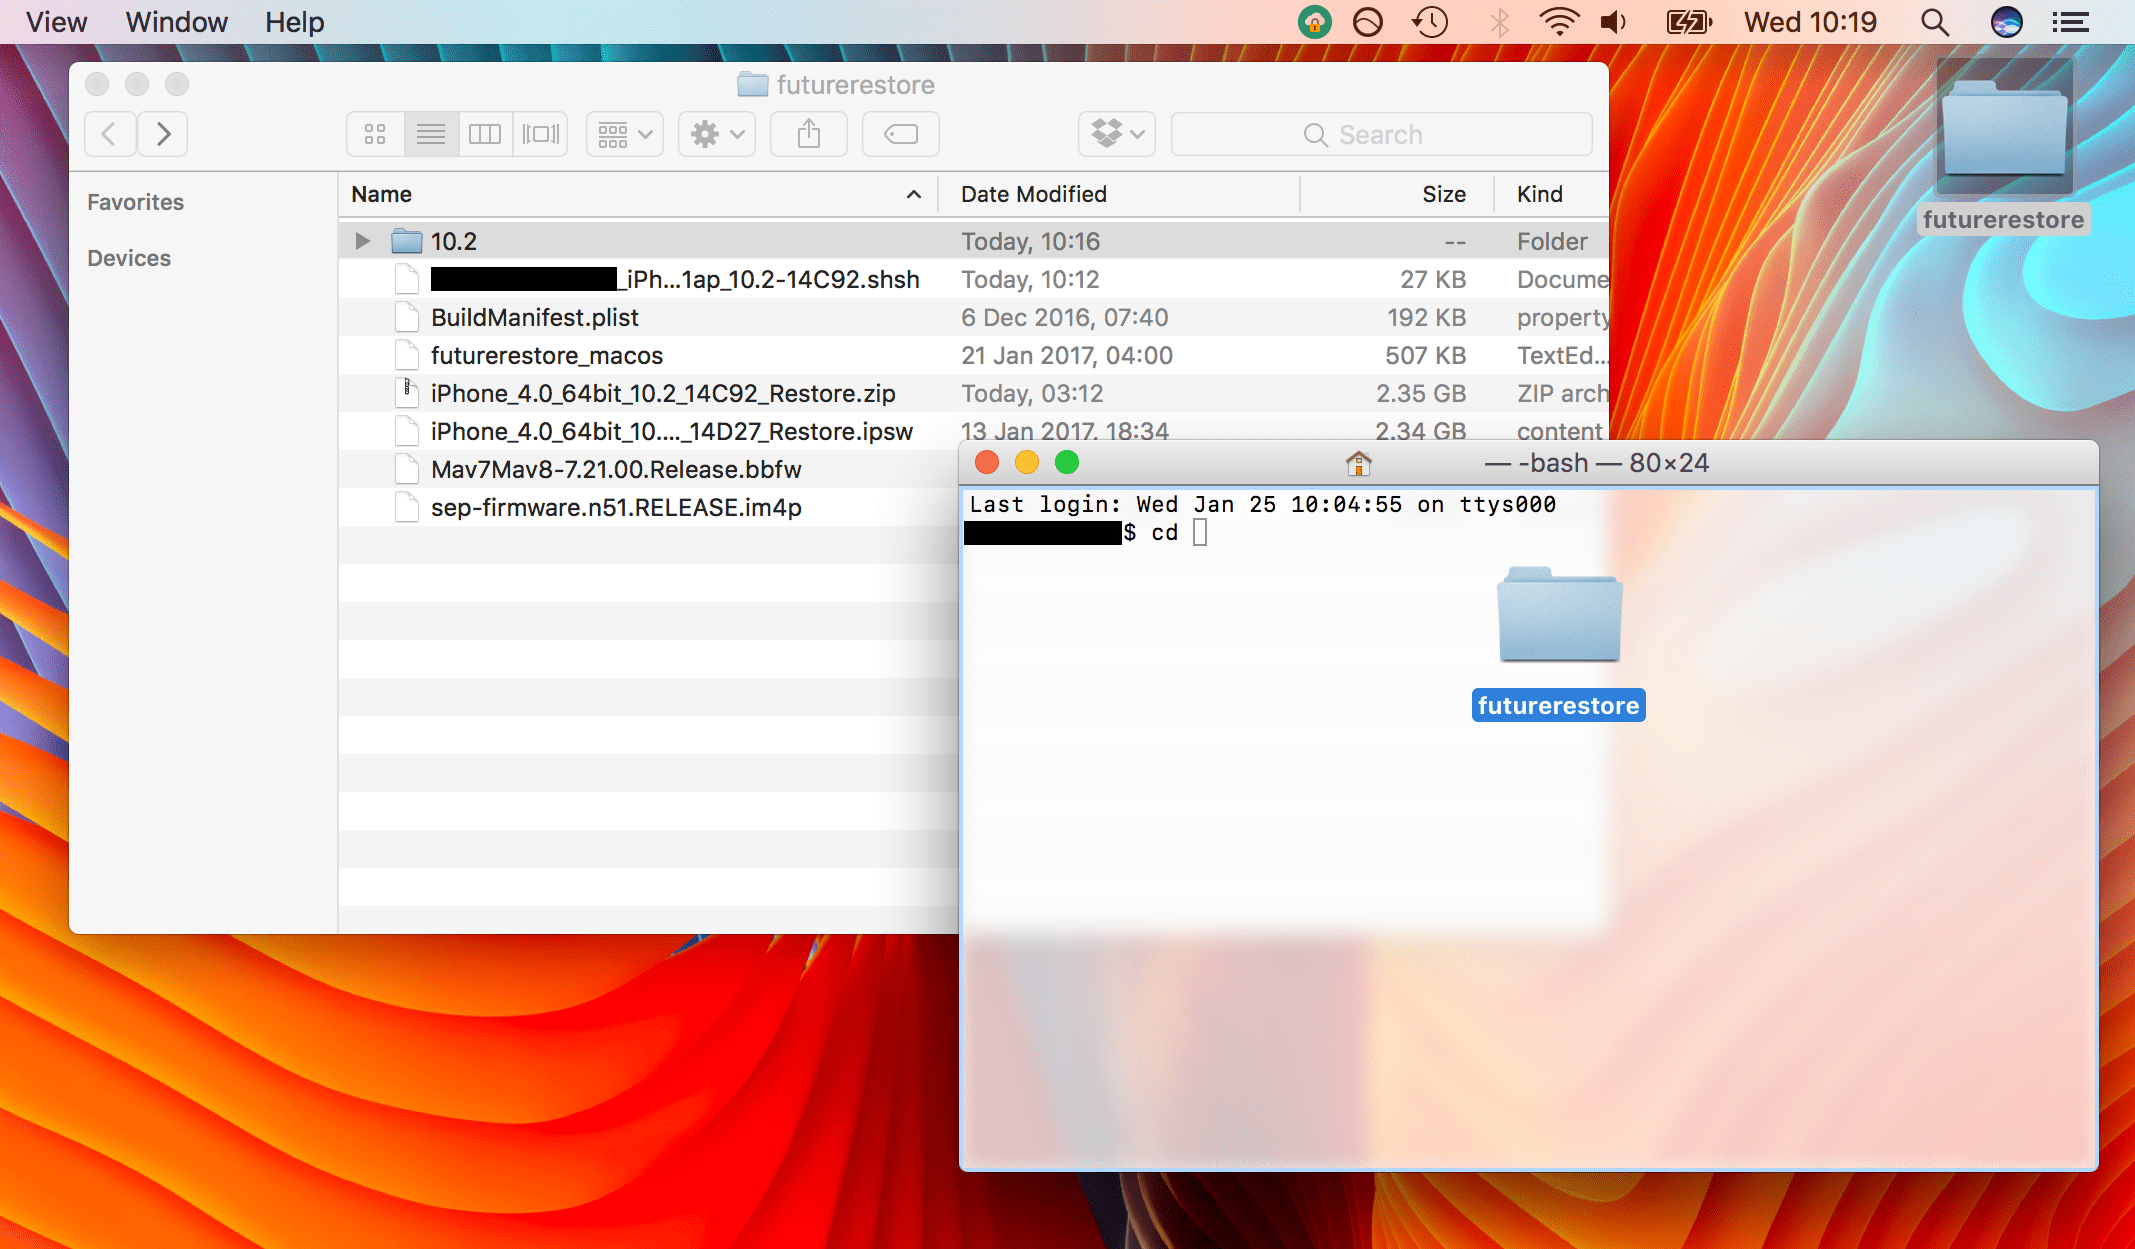
5)The futurerestore folder on your Desktop should now contain these files:
6)Open anewTerminal window. Terminal can be found in /Applications/Utilities, or via Spotlight. If using the Windows binary, you will need to use the Windows Command Line instead.
7)Typecdfollowed by a space, and drag yourfuturerestorefolder onto the Terminal window. Then press theEnterkey. Afterwards, your command prompt should show your current path as your futurerestore folder.
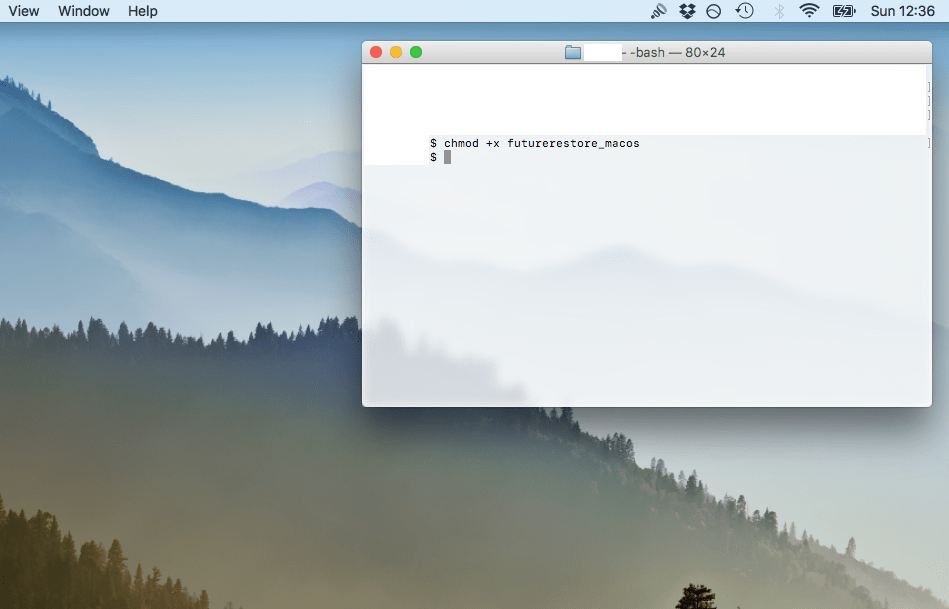
8)Now type in:
chmod +x futurerestore
9)We will now prepare the futurerestore command, but do not enter it yet. The easiest way to insert the filenames into the command is to type the first few letters of their name, and then press theTabkey on your keyboard to autocomplete the filename. ensure the correct file has been filled in before continuing, because some files such as the .shsh2 and IPSW may have similar names, and may be autocompleted incorrectly as each other.
a)If you are using thegenerator method, currently have ajailbreak, and already followedPart 1of this guide to set your generator, use the following command:
./futurerestore -t YOUR-DESTINATION-SHSH-HERE YOUR-DESTINATION-IPSW-HERE –latest-sep –latest-baseband
If you are restoring aWiFi only iPad, or anApple TV 4, replace–latest-basebandwith–no-baseband. Cellular iPads, and all iPhones, should use –latest-baseband.
Do not enter it yet.
b)If you are using theApnonce collision method, currently haveno jailbreak, and started this guide atPart 2, use the following command:
./futurerestore -t YOUR-DESTINATION-SHSH-HERE -w YOUR-DESTINATION-IPSW-HERE –latest-sep –latest-baseband
Remember, methodb)only applies to specific users, do not try this unless you know it applies to you.
Do not enter the command yet.
Replace all sections in capital letters in the above commands with the names of the corresponding files in yourfuturerestorefolder. For example,I would type./futurerestore -t, then aSPACE, then type the first letters of my SHSH filename, thenTabto complete it, then aSPACE, then-b,SPACE, then type the first letters of my baseband filename, thenTabto complete it, and so on. Leave the phrases–latest-sepand–latest-basebandas they are. Take your time and check the command thoroughly.
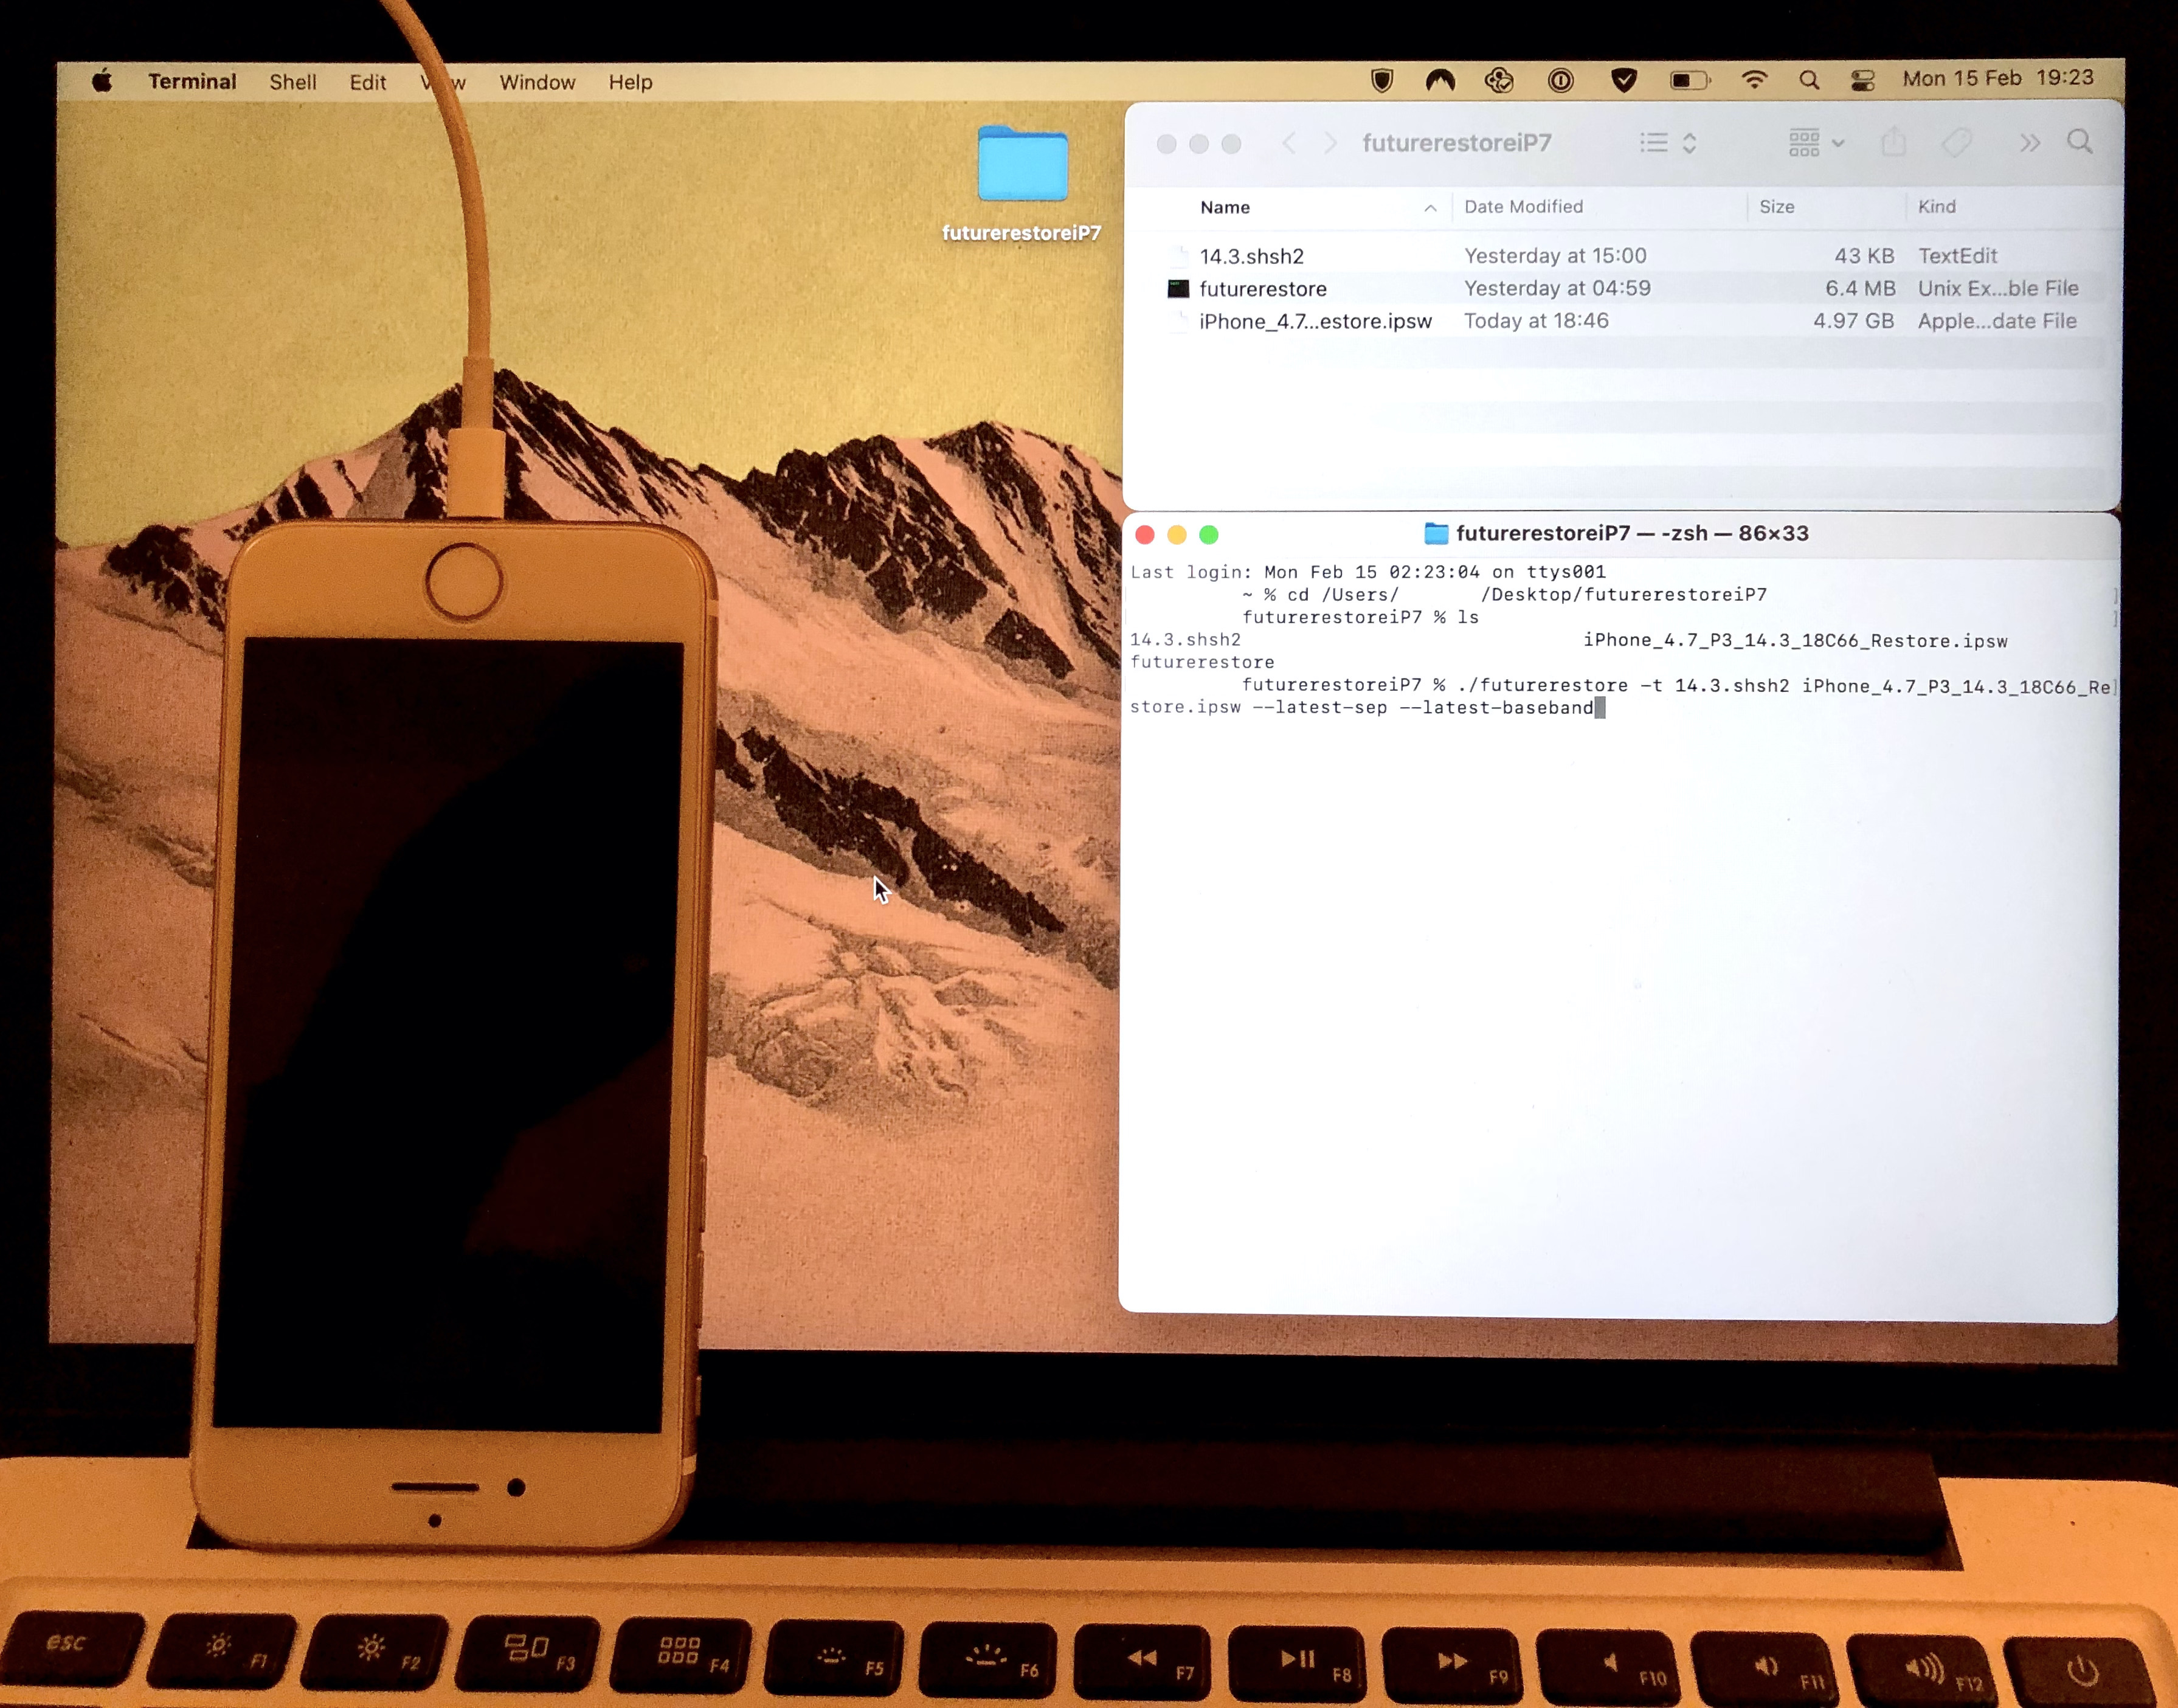
Below is an example of the finished command for an iPhone 7, moving to a destination firmware of iOS 14.3, using the –latest-sep and –latest-baseband options (which will grab some files we need from the latest signed firmware, 14.4.1 at the time of writing).
Note that theApnonce collision methodhas the-wvariable, but thegenerator method does not.
Do not enter the command yet.
a) Generator mode users:ensure your device has your generator set (see Part 1 of the guide), isTrustedby your computer, and is plugged into your computer.
b) Apnonce collision mode users:ensure your device is plugged into your computer, and manually place it into Recovery mode (A7 devices on iOS 9.1-10.2/10.3b1) or DFU mode (eligible A7, A8 and A8X devices on all firmwares).
11)PressEnterin your Terminal window to execute your futurerestore command, and initiate the restore process to your destination firmware.
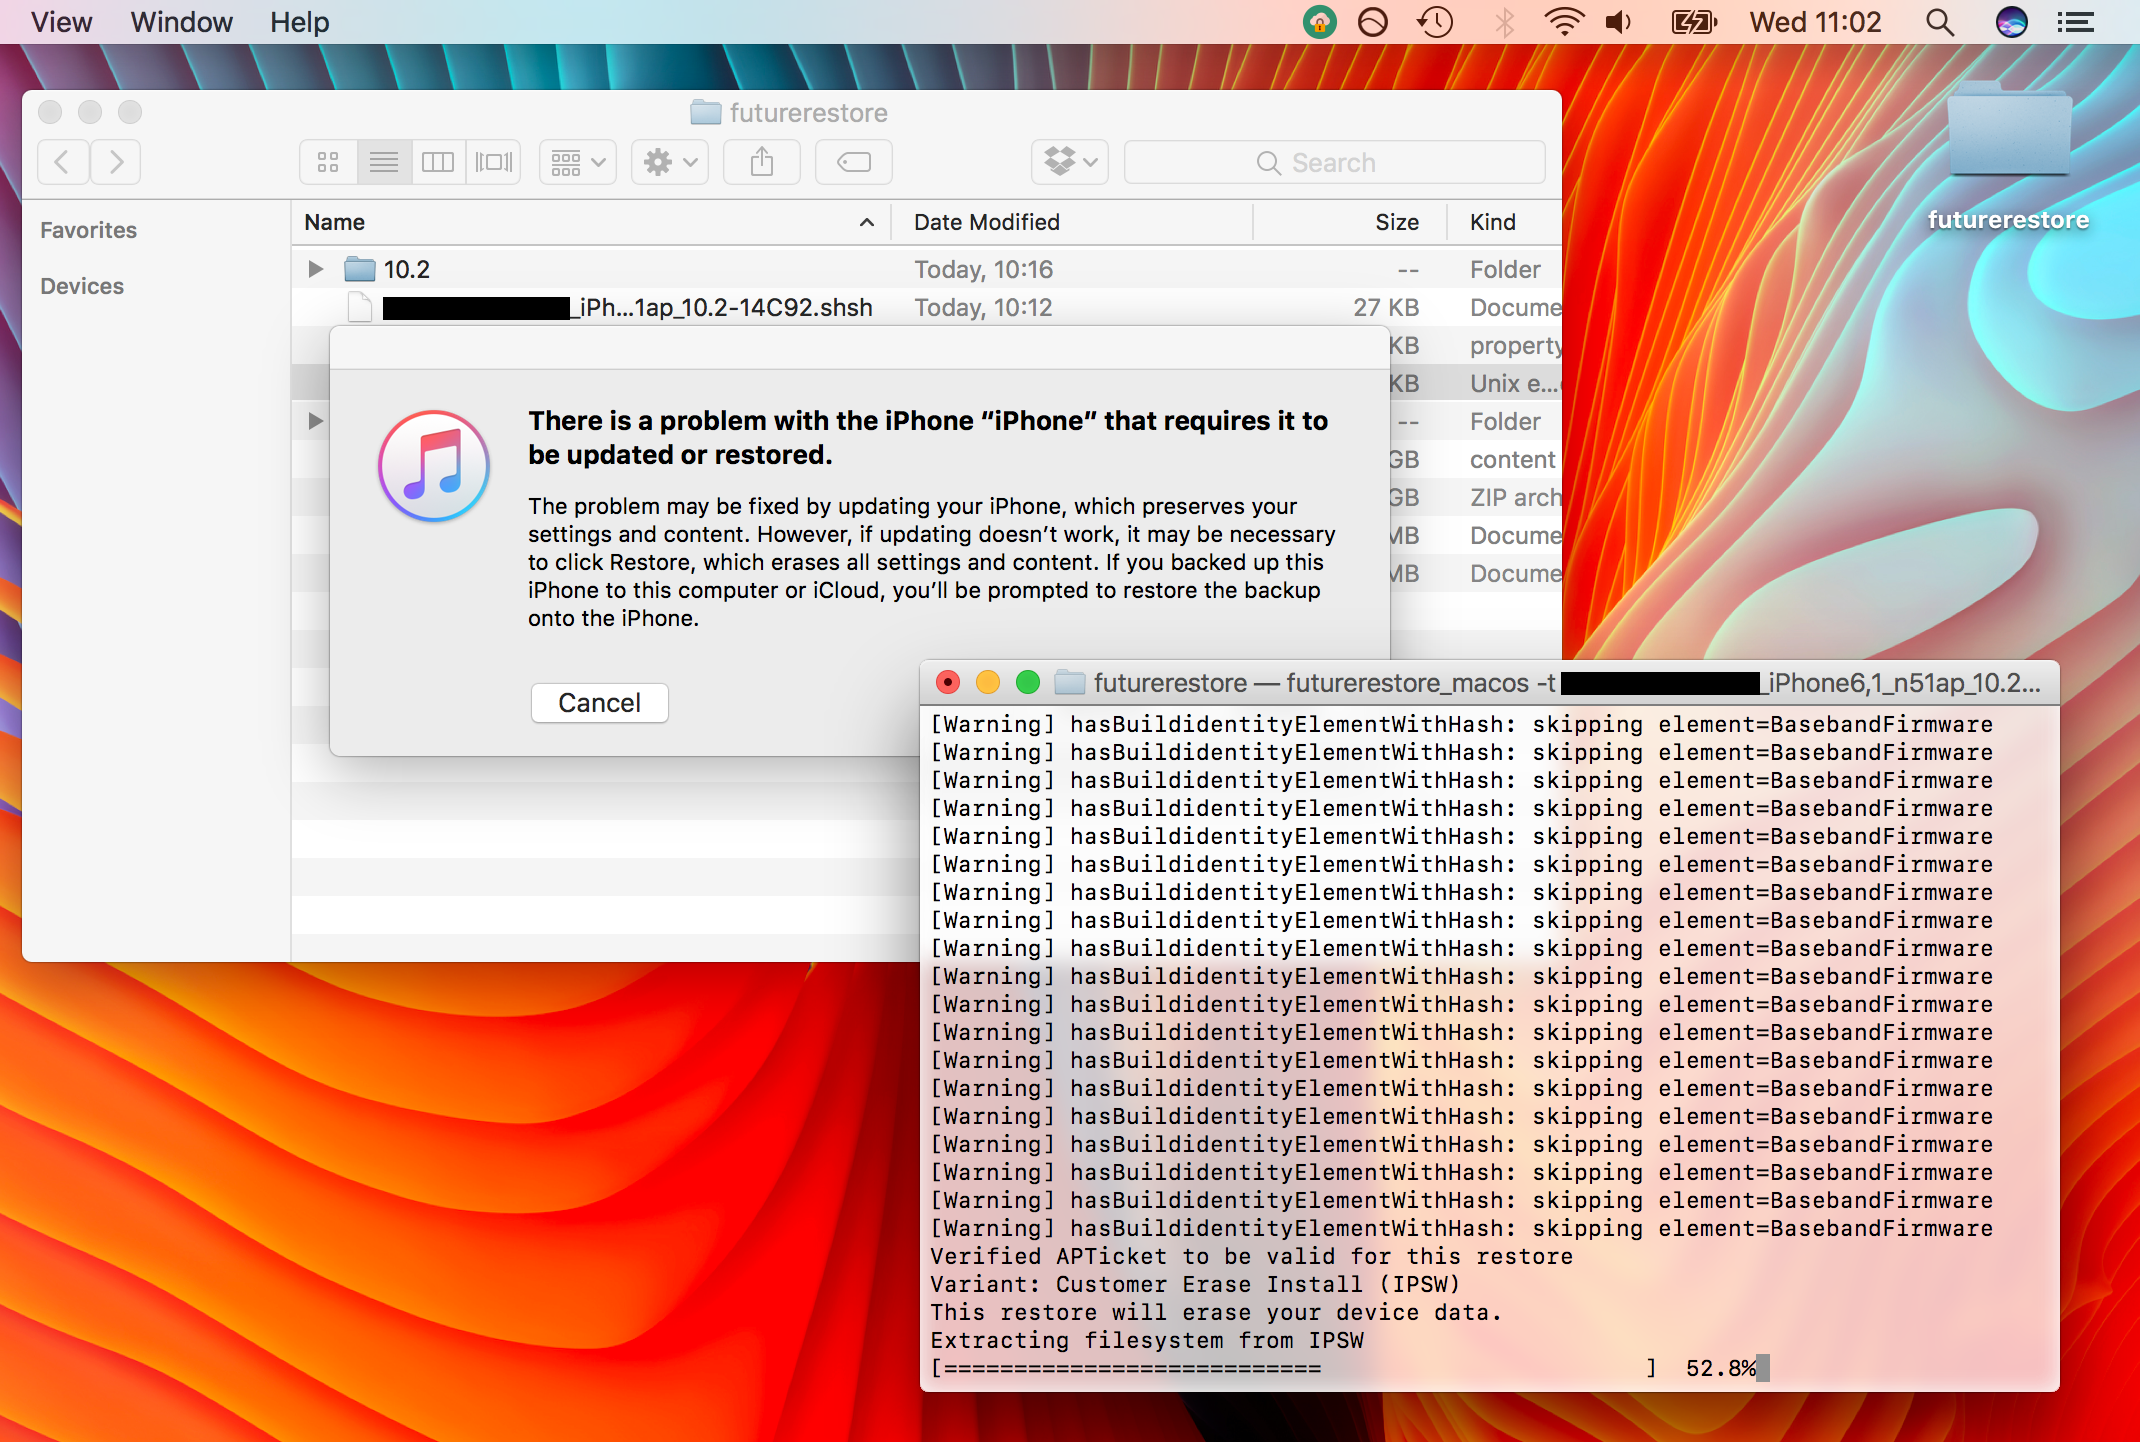
If everything has gone correctly, Terminal will now show futurerestore restoring your device. If you are using the Apnonce collision method you will have to wait until the correct Apnonce is generated for the restore to begin. This can take a varying amount of time, from 30 seconds to never (if you are requesting an Apnonce which does not collide – do not try this). Terminal will print out a list of Apnonces which your device generates until the generated Apnonce matches the one in your blob. Patience is key.
If you are using thegenerator method, your device should already have the correct set-up thanks to Part 1 of the guide, so the restore should initiate immediately.
12)Forgenerator modeusers it is quite likely that after executing the futurerestore command the device will reboot into Recovery mode and then hang, before reporting an error that the device could not enter Recovery mode, or similar. This is normal, and if it occurs, simplyre-enter the futurerestore commandinto Terminal after the error, without rebooting your device, unplugging it, or quitting Terminal.
13)Do not unplug your device, manually reboot your device, allow your laptop battery to die, restart or shut down your computer, quit Terminal, or allow your computer to sleep, until the process is complete.
14)Wait until the restore completes, and your phone returns to the setup screens. You are now on your destination firmware!
The futurerestore process is a little complicated, and has several parts which can be followed incorrectly. Take your time and read every step all the way through before following it.
If you encounter errors with the process, re-read the guide and browse /r/jailbreak for your issue before asking. It has probably been answered before. If you still have no luck, feel free to ask me in the comments section below, butprovide information.iOS, iPadOS, or tvOS version, exact device, computer OS, futurerestore mode, exact Terminal error you are getting, etc.
